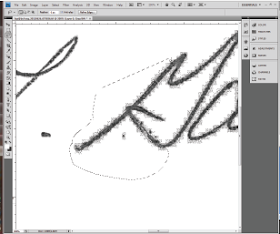
- Rescan the image and set the output to TIFF or other image file type. Be sure to select the highest resolution setting. This will yield a lot of artifacts on the image but you can remove them pretty easily.
- Open the file in Photoshop, and crop it; removing all excess white space around your work area.
- Go to the layers panel and create a new layer filled with white. Move this layer below your working layer and reselect the top layer.
Now, let’s get to work!

Next: Zoom in on a section of the signature—I chose 200% for this one—and select the Lasso tool. Then: Start with a small area, and select stray pixel artifacts surrounding the main letterforms.
Hold down Command + X (Mac) or Ctrl + X(Windows) to remove the pixels.
Repeat. Make sure that you zoom out to 100% every-so-often to be sure the right pixels have been removed.
Final Clean up
- Merge down layers. In the Layers panel select your top layer and select merge down from the dropdown.
- Increase contrast. Go to Image > Adjustments > Brightness/Contrast. With Preview on, move the brightness slider down to -150 and increase contrast to 100. Do this only once! . Then hit OK.
- Save it. Select File > Save As>


No comments:
Post a Comment